Personal trainer and sports scientist Luke Worthington recommends the following back stretches to improve spinal flexibility and reduce discomfort.
You might already spend time doing leg and shoulder stretches, or using the best foam rollers for post-workout recovery, but have you stretched your back recently? Spines are designed to move. However, they are designed to move with control – and in the places we want them to.
The easiest way to assess which areas a human body should be getting its movement from is to look at the cross-sectional area of muscle available in each segment.
Click here to jump to the stretches.

The areas with the greatest cross-sectional area of muscle are the areas that we can produce the most force, and also the areas where we can exercise the most control. If we look at the torso, the large phasic (force generating) muscles are the latissimus dorsi (lats) and the pectorals, these muscles wrap around the ribcage, and it is this area that we therefore have the ability to produce force through the upper body.
The section of the spine that has ribs attached to it is known as the ‘thoracic’ spine and consists of 12 vertebra each with a corresponding rib.
The areas of the spine with the least cross-sectional area of muscle are the cervical (neck) and the lumbar (lower back). Therefore, these are areas that we do not have ability to produce much force and should be considered as ‘stable’ segments.
‘Where there’s meat, there’s movement’
The easy way to remember this is with the phrase ‘where there’s meat, there’s movement’.
However, as well as giving the ability to produce force and control, large areas of phasic muscle can also – if not regularly maintained through movement – be responsible for reducing range of motion. If range of motion in one area of the body is reduced, then it is a simple principle of biomechanics that motion will have to increase in other areas – we call this a ‘compensatory’ movement pattern.
When it comes to the spine, the area that is most likely to get ‘tight’ is the area with the most muscle attached to it (thoracic) which also happens to be its largest segment (the thoracic spine consists of 12 vertebra, while the lumbar and cervical have 5 and 7 vertebra respectively).
If movement that is ‘supposed’ to be occurring in a very large segment is forced to occur at a much smaller one then it is of course shared between far fewer vertebral segments. That not only means a greater range of motion at each one, but also that these smaller segments are protected by significantly less phasic muscle. Both of these factors mean the risk of damage to these vertebral segments is very high.
Keeping all of these factors in mind, we can see that maintaining regular movement through the thoracic section of the spine, as well as maintaining strength and stability of the core musculature to support the lumbar spine, is the key to a pain-free back.
Best back stretches to prevent back pain
- Cat cow
- Half-kneeling windmill
- Thread the needle
- Seated QL stretch
- Standing wall press
- Couch stretch
Keep reading for full exercise instructions.
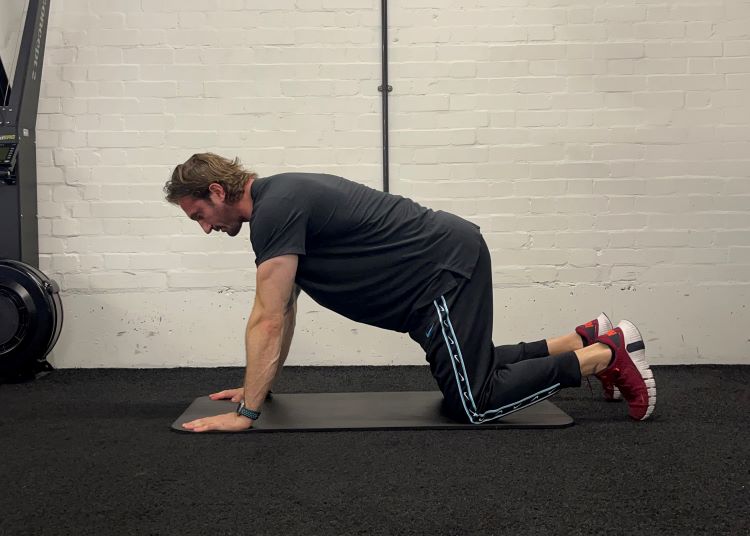
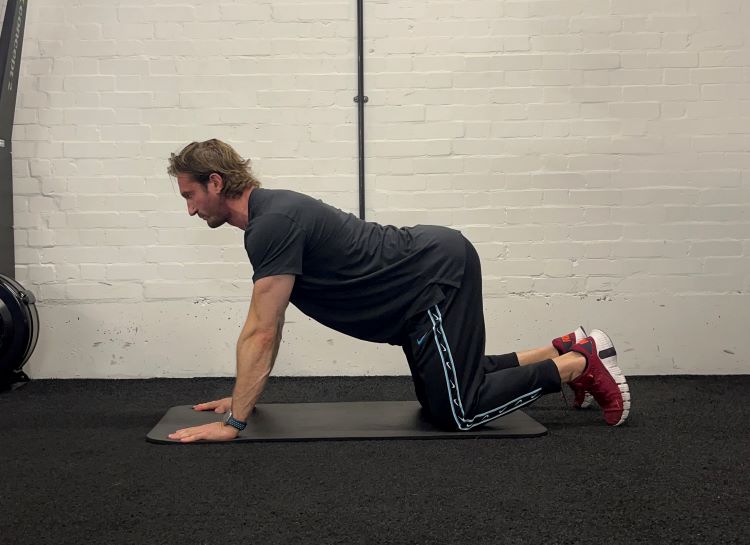
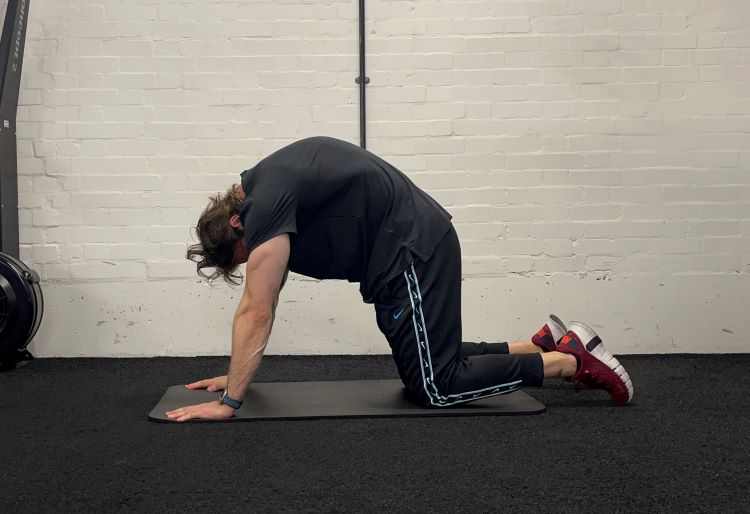
1. Cat cow
Reps: 8-10
Benefits of cat cow: The simplest stretch of them all, cat cow moves the thoracic spine gently through flexion and extension.
How to do cat cow:
- Start in an all-fours position with the knees under the hips and hands under the shoulders.
- Gently lift the mid-back towards the sky.
- Drop forehead towards the floor – your gaze should be back between your knees.
- Gently push your chest towards the floor.
- Lift the forehead but be sure not to overextend the cervical spine – your gaze should be towards the floor a few metres in front of you.
- Repeat this flexion / extension motion 8-10 times, gradually increasing the range each time.

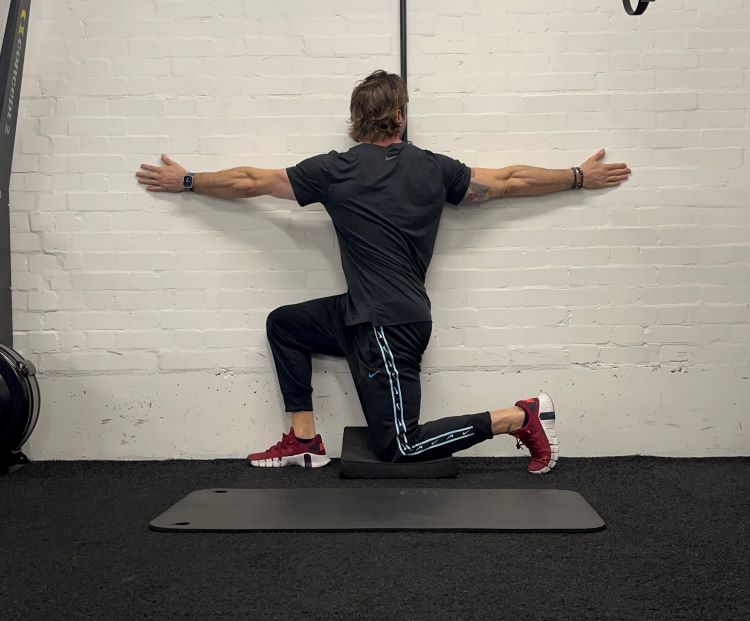
2. Half-kneeling windmill
Reps: 8 each side
Benefits of the half-kneeling windmill: This stretch moves the ribcage and thoracic spine through extension combined with rotation.
How to do the half-kneeling windmill:
- Start in a half-kneel position adjacent to a wall, the ‘down’ knee should be the outside one furthest from the wall.
- Reach both arms out in front of you, palms together.
- Keeping the arm straight, attempt to draw a half circle on the wall with the fingertips of the inside arm, the goal is to move through 180 degrees.
- Ensure the gaze always follows the fingertips of the moving arm.
- Once you reach your end range, retrace the semi circle back to the starting position, again ensuring gaze follows fingertips of the moving hand.
- Repeat 8 times on each side.
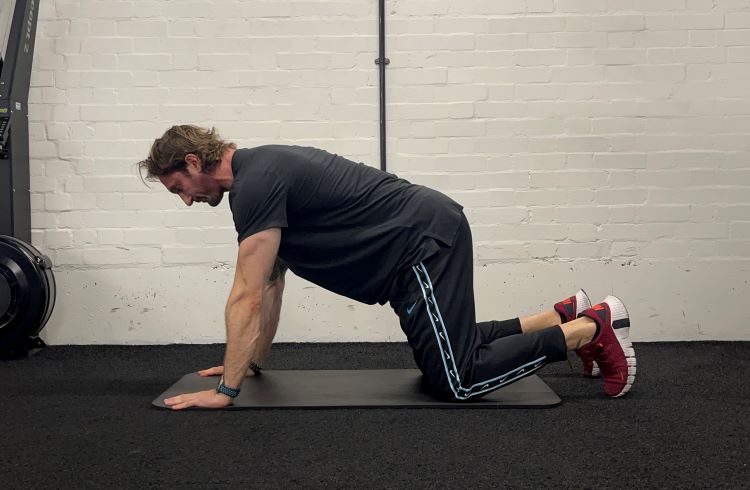
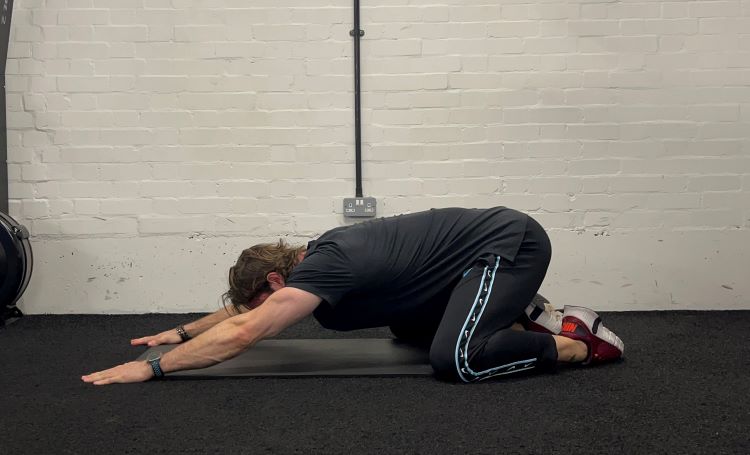
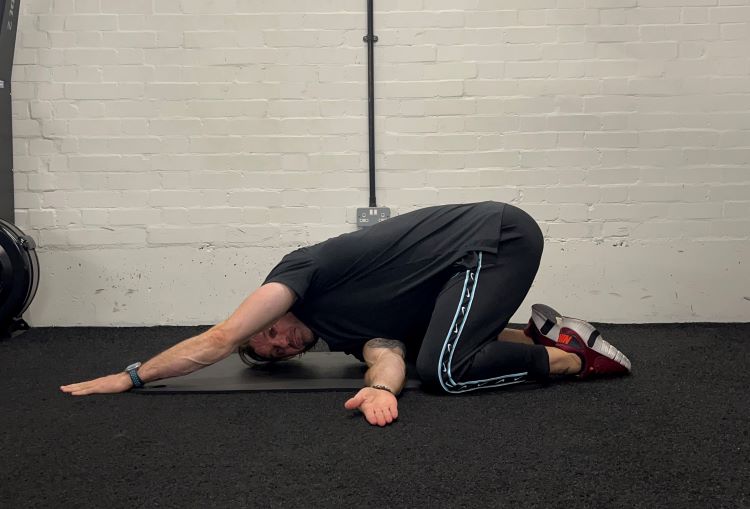
3. Thread the needle
Reps: 30 seconds each side
Benefits of the thread the needle: This stretch moves the ribcage and thoracic spine through internal rotation and allows a deep stretch of the lats.
How to do the thread the needle:
- Start in an all-fours position with the knees under the hips and hands under the shoulders.
- Keeping the hands where they are on the floor, rock the hips back until you are sitting on your heels.
- Reach the right arm through the space between your left armpit and the floor.
- Your gaze should be under the left armpit.
- Hold for 30 seconds then repeat on the opposite side.
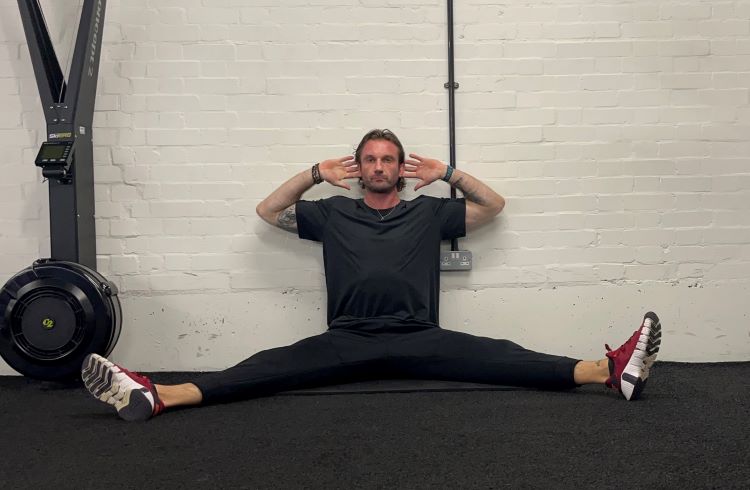
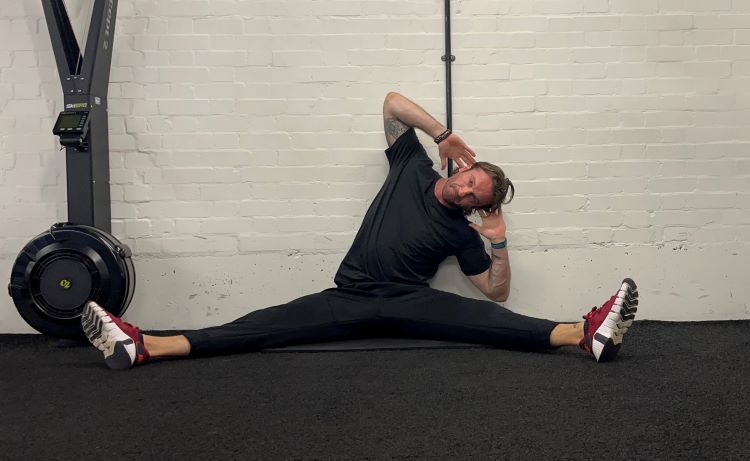
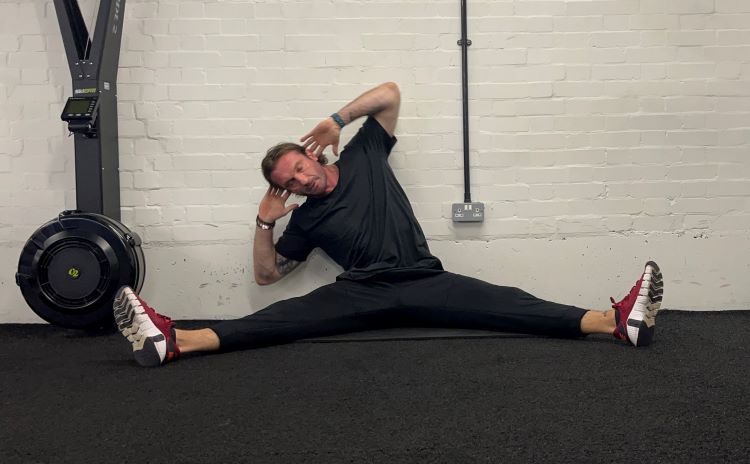
4. Seated QL stretch
Reps: 10 each side
Benefits of the seated QL stretch: This lengthens and also strengthens the quadratus lumborum muscle (QL) that runs diagonally between the lower ribs and the pelvis in the lower back.
How to do the seated QL stretch:
- Sit with your back against a wall with both legs outstretched in an abducted (straddle) position.
- The adductors (inner thighs) should feel like they are in a gentle (not maximal) stretch.
- Put your hands to the side of your head, elbows flare out to the side.
- Take a deep breath in, and on the exhale lean the upper body to the left, attempting to push the left elbow towards the floor.
- You should feel a stretch in the right QL (a stretch in the right hand side of the spine).
- On the next inhale come back to the starting position, you should feel this same muscle on the right hand side activate.
- Exhale and lean the torso to the left, attempting to push the left elbow to the floor, you should feel the same stretch now on the right hand side.
- Repeat alternately 10 times on each side.
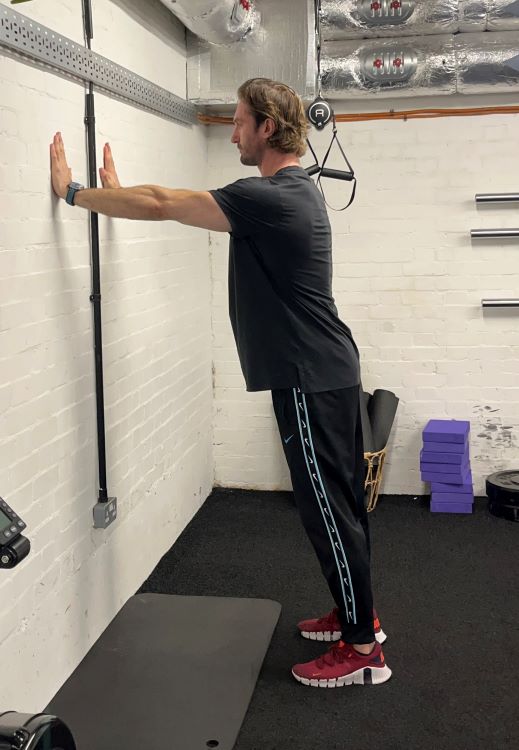
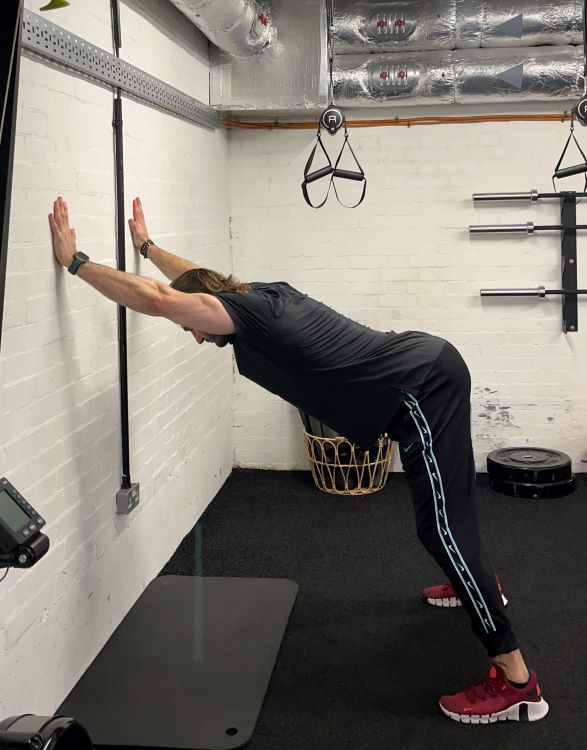
5. Standing wall press
Reps: 3 x 30 seconds
Benefits of the standing wall press: Performing this stretch moves the thoracic spine into extension while allowing a deep stretch of the lats.
How to do the standing wall press:
- Stand facing a wall about an arm’s length away.
- Reach both arms in front of you, placing the palms flat to the wall, fingertips upwards.
- Start to shuffle your feet backwards away from the wall, at the same time leaning forwards and attempting to push your breastbone towards the floor, ensuring your gaze is down at the floor and not at the wall.
- As you lean forwards and down, try to press the hands firmly into the wall.
- You should feel a deep stretch in the lats and triceps, as well as being aware of the thoracic spine extending.
- Hold for 30 seconds and repeat three times.
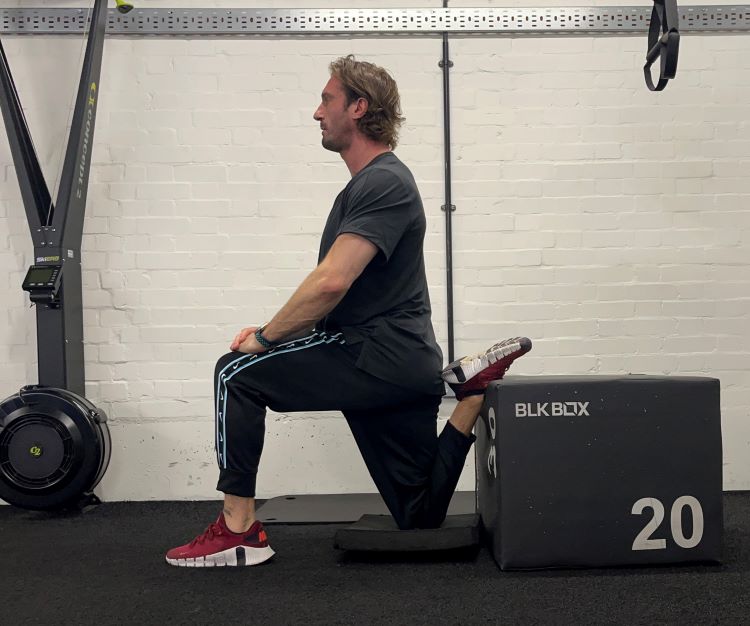
6. Couch stretch
Reps: 2 x 1 minute on each side
Benefits of the couch stretch: While not strictly speaking a ‘back stretch’, this one is vital for maintaining a pain-free spine. Keeping length and strength through the hip flexors helps to prevent excessive extension of the lumbar segment.
How to do the couch stretch:
- Set up in a half-kneel position, facing away from a bench or box (or couch), right knee on the floor, left foot in front.
- The left foot should be directly below the left knee, with the hip and knee at 90 degrees.
- Rest the right foot on the box or bench, which should place the right knee into deep flexion.
- Shuffle the right knee as close to the box or bench as you can manage, bringing the right heel as close as possible to the right buttock.
- When you feel a deep stretch in the front of the right hip, sit tall with the hands resting on the left knee.
- Hold for 1 minute, repeat twice on each side.
Related content:

