When it comes to training that delivers results you will definitely enjoy, Pole Strength should be top of the list.
The impact it can have on your physique is powerful – think shoulder power, abs strength, and mobility across your whole body.
Benefits of pole strength
The fact that holding on to a pole requires so much strength, and recruits so much synergistic, core muscle, means if you spend enough time on it to progress, you’ll see your muscle tone and shape transform dramatically.
Across most calisthenics, martial arts and weight lifting, you need an understanding of how to connect your shoulder frames to your hip posture. An example of that is a front lever. A lot of people lose the ability to lock their pelvis in posterior rotation when they engage their lats, which is why front levers feel so hard to learn. Not only can pole teach you this, but it can teach you how to do so in the sagittal, frontal and transverse planes.
Lastly, the pole is incredible for developing your strength in external rotation of the shoulder, at leverage (when your arms are straight). This is often one of the weakest, least trained movement patterns, which is why pole always feels so hard when you first start, but also highlights why it’s such a valuable method of exercise for so many people.
How to get started with pole strength
To get started with pole strength, try to find a decent class locally. Your enjoyment of using the pole will increase exponentially once you get past the first few humbling sessions, so getting some good coaching, to get past those first lessons quickly, makes a lot of sense.
Below I’ve given some of my favourite drills to hit. I run this sort of thing in the weekly Pole Fitness class at the Wild Training Gym. You can do them, it just takes trying, some patience and good instruction.
The following exercises develop the component parts of strength you need to be able to hold a proper flag – not a jump and quick snap on your phone, but a proper, controlled human flag.
There you go. Set a decent goal and go and get it.
Human flag progressions: your four-step plan

1. Split-Grip Crunch
- This will develop your wrist and grip strength. It will also get you used to pulling with your top arm, while pushing with your bottom arm.
- It’s not just about straightening your arms, but protracting your shoulders actively – that’s when your shoulders will feel more powerful.
- The knee lift is a nice way to develop your abs and hip flexors.
- If you extend your legs, you’ll increase the leverage, and the abs and hips flexors will be working a lot harder.

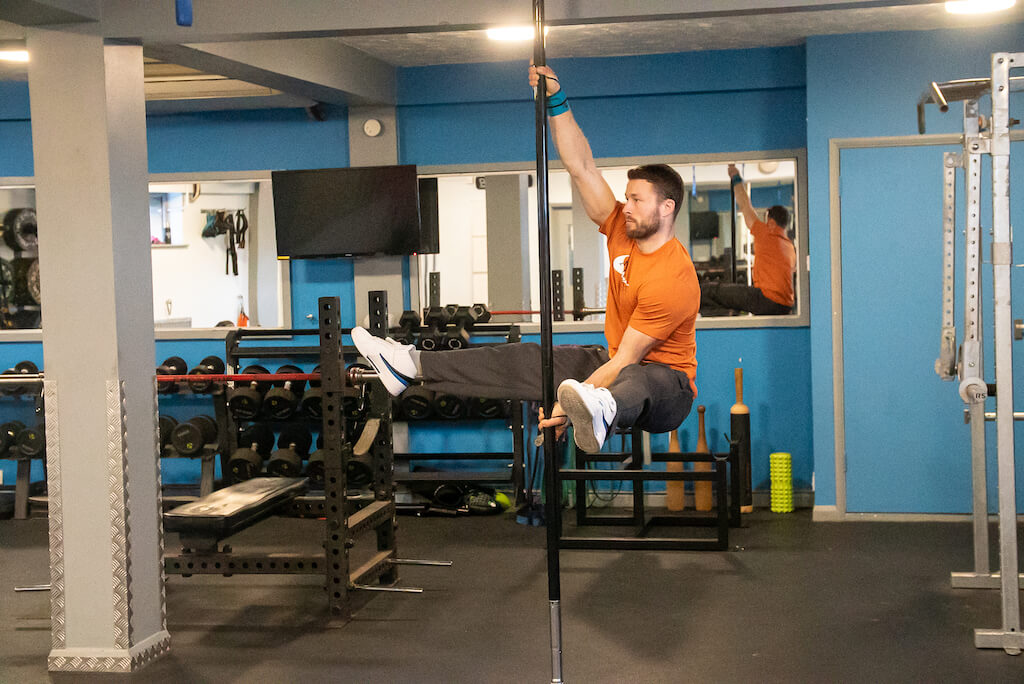
2. Revert Crunch
- This is the same set-up, with the arms, as the split-grip crunch above. The difference now is that you’re going to start with your legs under your lower arm, and then as you pull up and lift your knees, you’re going to turn your hips to face the other way.
- This rotation is what you need to be able to do to hit your hand springs: when you start going upside down on the pole.
- It’s also an amazing exercise for cutting some good shape into your abs. The progression is to hit a v-sit at the top of the crunch, by extending your knees.
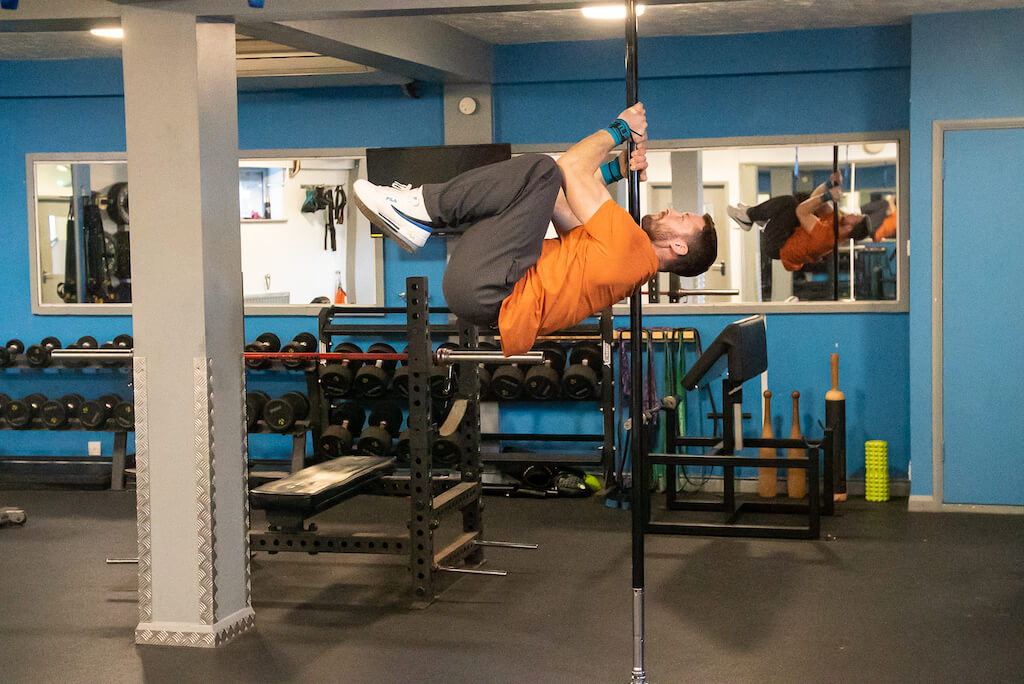
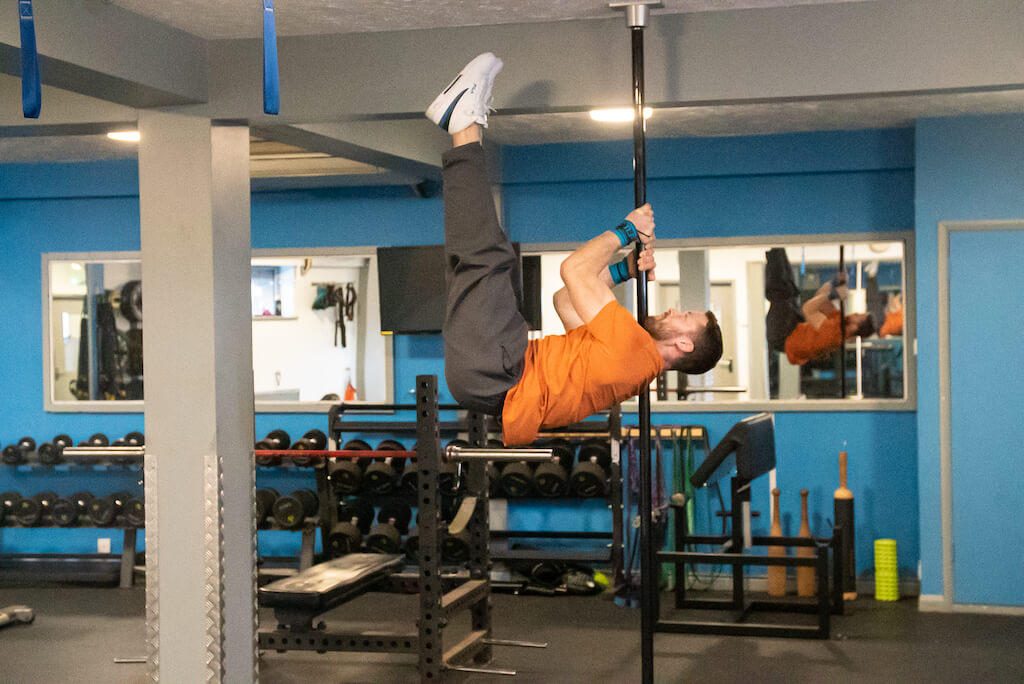
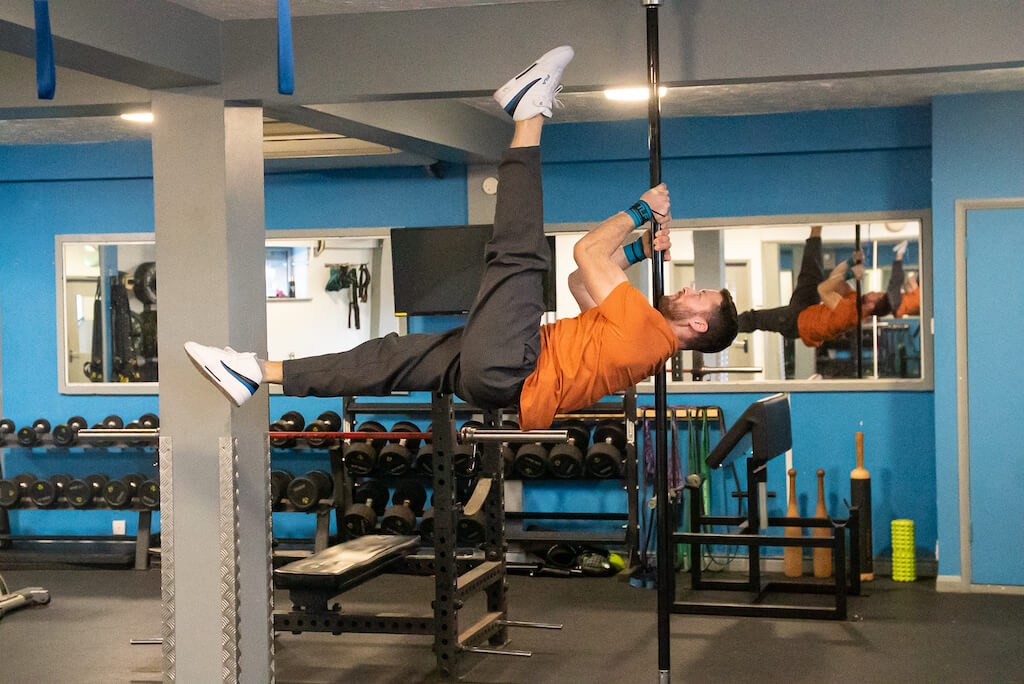

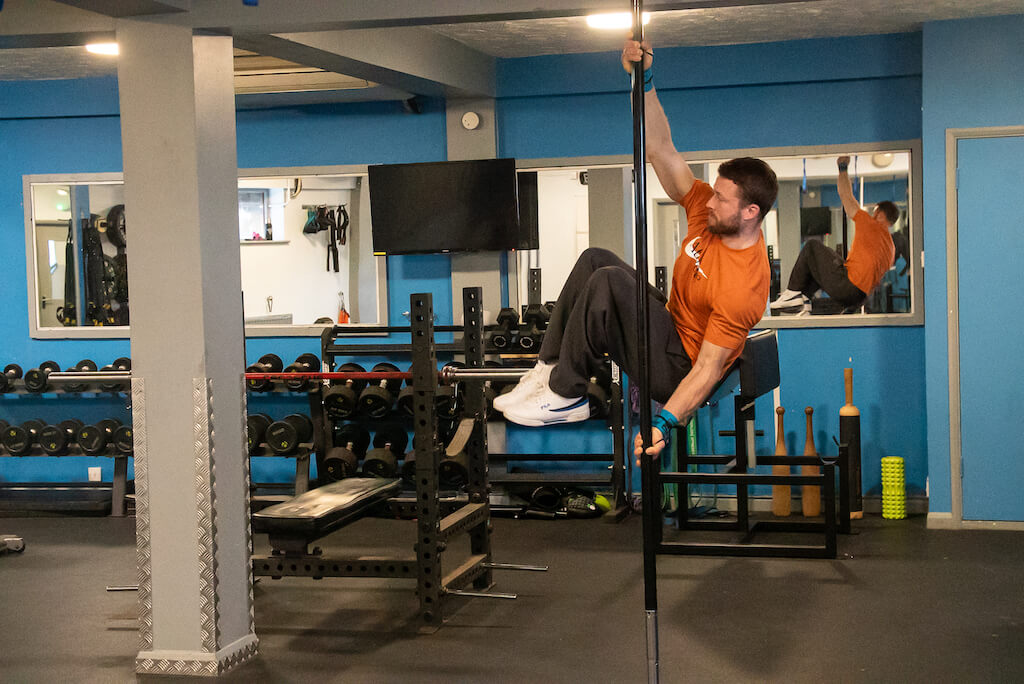
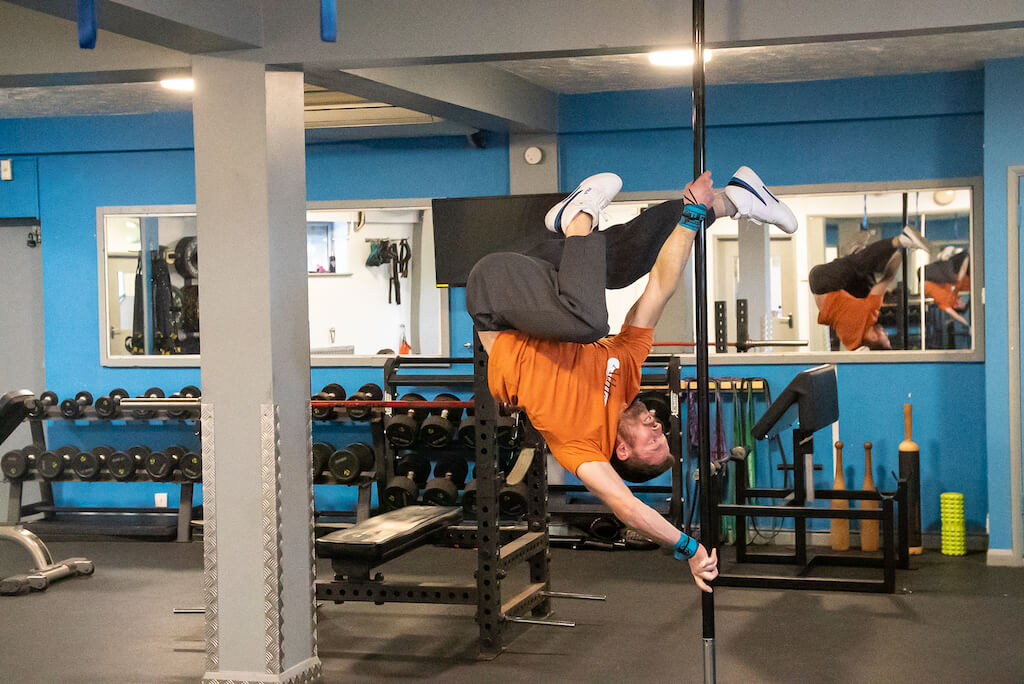
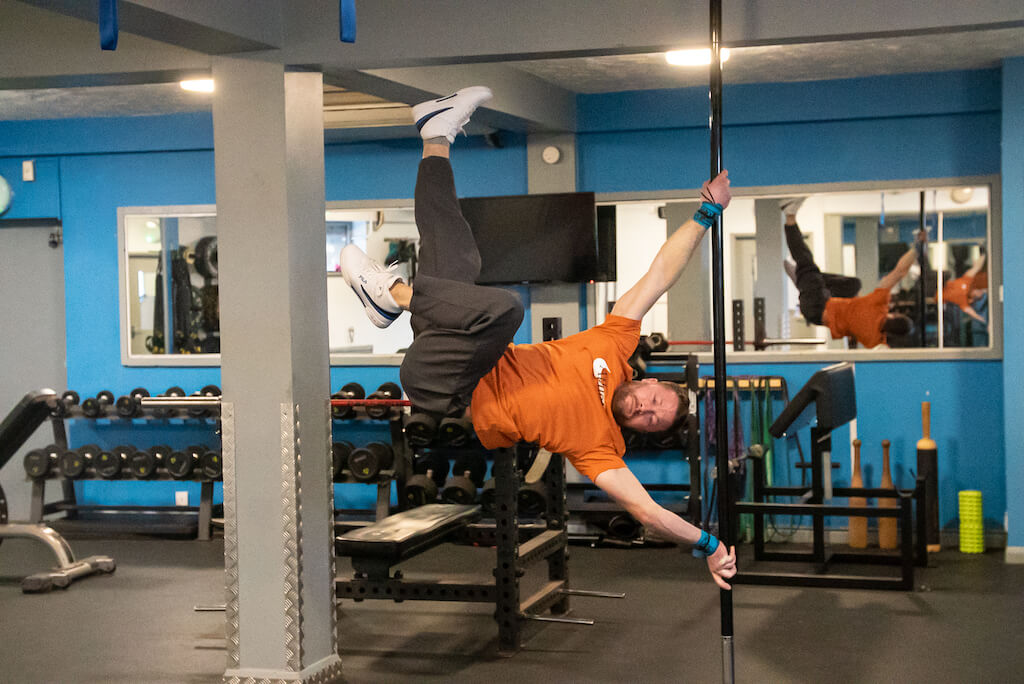
3. Shoulder Mount Crunch
- If all I knew was the shoulder mount crunch, it would still be enough for me to love pole. It’s such an amazing stretch for your abs, and it links that strength from your lats to your hips in posterior rotation. You will enjoy the results a lot.
- Set up by taking a strong grip that essentially feels like you are trying to snap the pole over your shoulder.
- Start looking up, and get the pole on the chunkier part of your traps, near your neck.
- Pull hard to create the grip, and pull your knees up to your elbows. As progressions, you can start by extending your knees to push your feet up to the ceiling.
- Next, lower one leg down to increase the leverage. After that, can you lower both legs down.
- Don’t let your hips drop. Keep the hips in posterior rotation, and keep pulling hard on the pole.

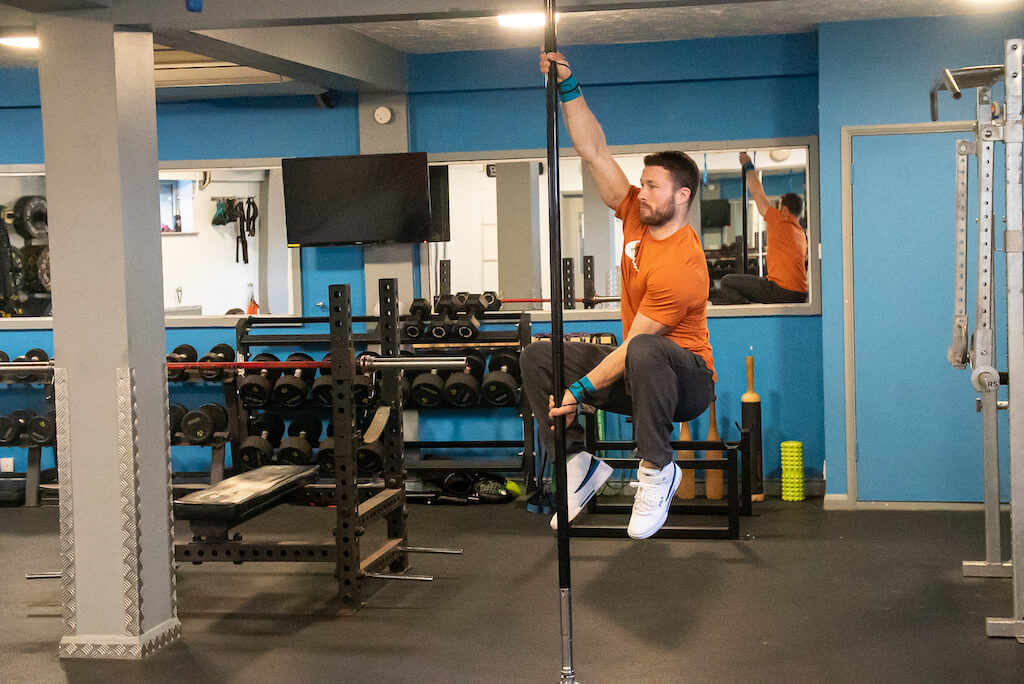
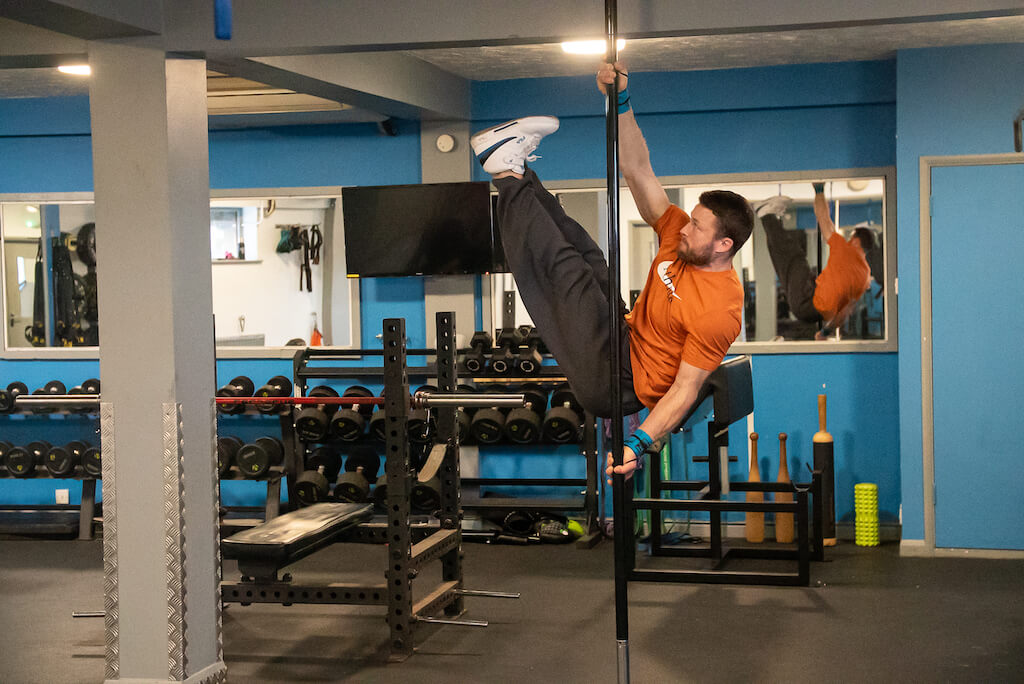
4. CC Flag Drop
- This isn’t a flag, but it is an easier option to start developing the strength needed.
- You can use a split grip like you’ve practiced above, or a false grip, where you rotate your top arm internally.
- Pop up and get upside down, with one leg either side of the pole. Then, as you lower your hips back down very slowly, you want to bend one knee and keep both hips flexed – this is to reduce leverage and give you the opportunity of slowing down the lowering phase.
- This is all about pulling with your top arm, pushing with your bottom arm, and staying tight through your core and hips.
- The slower you go on the drop, the closer you’ll get to holding the static, then you can start to work on options to gradually extend your legs.
Photography: Kurt Hicks